By Claire Whitaker
Updated November 2026
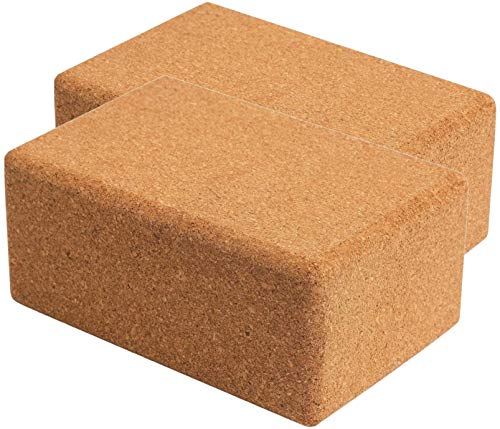
Yoga body handstand blocks are not a separate piece of equipment, but a way of using standard yoga blocks as a stable surface or spacer while you train a handstand. Placed under the hands, they raise the base of support so you can practice shoulder stacking and wrist position without the floor pushing back against your fingers. They are most useful for building strength and awareness, not as a shortcut to balance.
Why Blocks Help With Handstand Practice
When you press into the floor in a handstand, the wrists often bend past their comfortable range, and the shoulders can collapse forward. Lifting the hands onto blocks changes the angle of the wrist and lets you feel where the weight should sit. Many teachers use blocks as a bridge between wall work and free balance, because the hands stay in a familiar place while the body learns the line from fingertips to hips.
Shopping for one? See our guide: Foam vs Cork Yoga Blocks (2026): Which Is Better for Your Practice?.
Blocks also give you a consistent height to practice against. If your hands are on a block that is 4 inches tall, you can measure progress by how long you hold and how far you can lift the legs, rather than by guesswork.
Factors That Affect Your Setup
- Block height: Start with the lowest height that still lets your shoulders stack over your wrists. Raising the blocks too high can pull the chest forward and strain the lower back.
- Block stability: Use blocks with a flat, non-slip surface and place them on a mat, not on a smooth or uneven floor.
- Hand spacing: Keep the hands about shoulder-width apart, with the middle fingers pointing forward and the palms pressing evenly.
- Wrist comfort: If the wrists hurt, lower the height or reduce the time spent in the pose. Wrist discomfort that persists should be assessed by a doctor or physical therapist.
How to Set Up and Practice With Blocks
- Place two blocks on a mat about shoulder-width apart, both on the same height setting.
- Kneel facing the blocks, then place the palms flat on the top surface, fingers spread.
- Walk the feet toward the hands until the hips are above the shoulders, keeping the knees slightly bent.
- Press firmly through the palms and lift one leg at a time, holding for 5 to 10 breaths.
- Step the feet back down the same way you came up, and rest in child’s pose between attempts.
Practice this three to five times, then move to the wall once the setup feels steady. For a fuller progression, see Yoga Poses for Handstand: 6 Steps to Build Strength and Balance, which covers the same ideas in more detail.
Tips for Safer Practice
- Warm up the wrists and shoulders first. Yoga Warm Up Sequence: 8 Gentle Moves to Prepare Your Body is a good place to start.
- Never kick up with force. Lift slowly and bring the legs down with control.
- Keep a spotter or wall nearby when you first try lifting both feet.
- Stop if you feel sharp pain in the wrists, elbows or neck.
For related ideas on using blocks in other poses, Yoga Postures with Blocks: 6 Step-by-Step Poses for Better Alignment offers a useful set of examples.
What We’d Use
A pair of firm, non-slip yoga blocks is the only equipment you need for this drill. Look for a density that won’t compress under your body weight.
If you practice on a slick floor, a mat that grips well keeps the blocks from sliding during the lift.
FAQ
Can beginners use yoga body handstand blocks?
Yes, blocks are often recommended for beginners because they reduce wrist strain and make the hand position easier to learn. Begin with the blocks at their lowest height and only move up when the setup feels stable.
How high should the blocks be?
Choose a height where your shoulders sit directly over your wrists without the chest pulling forward. Many people find the lowest setting works best for the first several weeks.
Do blocks replace wall practice?
No. Blocks and a wall serve different purposes. Blocks help with hand position and alignment, while the wall helps with balance and confidence. Using both gives the most complete practice.
Related reading
- Yoga Poses with Blocks: 6 Steps to Better Alignment and Support
- Yoga Mat and Blocks Set: How to Choose and Use One for Home Practice
- Yoga Exercises with Blocks: 6 Beginner-Friendly Moves to Try at Home
- Yoga Blocks for Wrist Pain: A Step-by-Step Guide to Gentler Weight-Bearing
Ready to choose one?
About Claire Whitaker
Claire Whitaker is part of our editorial team and reviews and edits our yoga guides, checking product details against manufacturer specifications and owner feedback.