By Claire Whitaker
Updated November 2026
The rocket 1 yoga sequence is a fast, energizing flow built around a few core standing and seated poses that link together with breath. This guide walks you through each movement in order, explains how to breathe through the transitions, and shows you where beginners usually go wrong. By the end, you will be able to move through the full sequence at a steady pace in about 15 minutes.
What the Rocket 1 Yoga Sequence Covers
Most versions of this sequence follow a simple pattern: a warm-up of standing postures, a short run of forward folds and planks, and a closing that returns the body to stillness. Rocket-style flows are a dynamic variation of vinyasa, so the key feature is that each pose connects to the next on an inhale or an exhale. If you are new to flowing practices, you may find it useful to read Vinyasa Flow Yoga Poses: 8 Core Postures and a Simple Sequence first, since it covers the shapes you will repeat here.
Shopping for one? See our guide: Yoga Sequence for Summer Solstice: 6 Best Books and Planners Compared (2026).
Step-by-Step Rocket 1 Yoga Sequence
Move slowly through these steps the first few times, holding each pose for five breaths before you link it to the next.
- Mountain pose (Tadasana). Stand with feet hip-width apart, weight evenly spread, and arms by your sides. Take three breaths.
- Raised arms. On an inhale, sweep your arms overhead and lift slightly onto the balls of your feet. Keep the ribs soft.
- Forward fold (Uttanasana). On an exhale, hinge at the hips and fold forward, bending the knees as much as needed to keep the back flat.
- Halfway lift. Inhale, lift the torso to a flat back with hands on the shins or thighs. Exhale to fold again.
- Plank. Step or jump both feet back to a high plank, shoulders stacked over wrists and the body in one line from head to heels.
- Lower and cobra or upward dog. Lower the body on an exhale, keeping elbows close, then lift the chest into a gentle cobra with the shoulders away from the ears.
- Downward dog. Press back to hips high, heels reaching toward the floor, and breathe for five slow breaths.
- Return and rise. Step or jump the feet forward, fold, then rise to standing with arms overhead to close the round.
Repeat the full round three to five times, then rest in child’s pose for two breaths before stopping.
Breathing and Pacing
The sequence works because the breath sets the speed. Use one breath for each movement where possible: inhale to lift or extend, exhale to fold or lower. If you cannot keep up, slow the pace rather than skipping poses. A round that takes 90 seconds with steady breathing is more useful than a rushed one that strains the lower back or shoulders.
| Goal | Rounds | Approximate time |
|---|---|---|
| First practice | 2 | About 8 minutes |
| Regular practice | 3–5 | About 12–15 minutes |
| Advanced flow | 5–8 with no rest | About 20 minutes |
Preparing Your Space and Body
Before you start, warm the body with a few gentle movements. A short routine such as Yoga Warm Up Sequence: 8 Gentle Moves to Prepare Your Body reduces the chance of strain in the shoulders and hamstrings. Clear enough floor space to take a full arm span in each direction, and keep a mat under your hands and feet so that you do not slip in the plank and downward dog.
Recommended gear
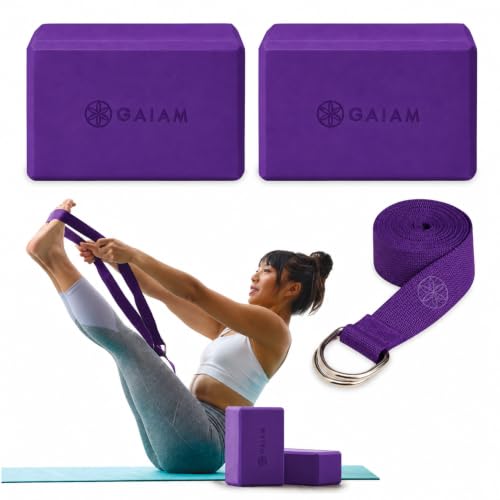
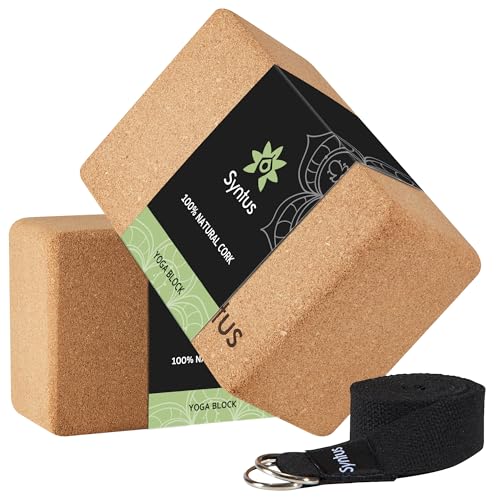
A non-slip mat helps most in the plank and downward dog, where hands and feet need grip. A set of cork or foam blocks can bring the floor closer if you struggle to reach the shins in the halfway lift or the forward fold.
- Non-slip yoga mat to keep your hands and feet steady during plank and downward dog. View on Amazon
- Foam yoga blocks to shorten the reach in forward folds without rounding the back. View on Amazon
Common Mistakes to Avoid
- Rushing the plank-to-cobra transition, which can strain the lower back. Lower slowly with control.
- Locking the knees in forward fold. Keep a soft bend so the hamstrings do not pull.
- Shrugging the shoulders toward the ears in downward dog. Press the floor away and widen the shoulder blades.
- Holding the breath during the jump-back or step-back. Keep breathing steadily through the move.
- Skipping rest. Take child’s pose between rounds if your heart rate climbs too fast to breathe comfortably.
If you have a wrist, shoulder, back or heart condition, check with your doctor or a qualified yoga teacher before starting a dynamic flow.
FAQ
Is the rocket 1 yoga sequence suitable for beginners?
Yes, if you slow the pace and use modifications such as stepping back instead of jumping. Beginners often start with two rounds and build up over several weeks.
How long should I hold each pose?
Aim for about five breaths in the standing and downward dog poses, and one breath per movement in the transitions. Adjust as your strength and breath control improve.
Can I practice this sequence every day?
Most people can practice a short round daily, but include rest days or lighter sessions if you feel sore in the wrists, shoulders or lower back. Listen to your body and reduce intensity when needed.
Conclusion
The rocket 1 yoga sequence gives you a compact, energizing practice that you can repeat at home with minimal equipment. Focus on linking each pose to a breath, keep the transitions controlled, and build rounds gradually. With regular practice, the flow will feel smoother and more natural.
Related reading
- Yoga Slow Flow Sequence: A Step-by-Step Guide for Beginners
- Yoga Sequence for Knee Pain: A Gentle Step-by-Step Guide
- Yoga Sequence for Beginners PDF: A Step-by-Step Guide for Home Practice
- Yoga Poses for Losing Weight: 6 Sequences That Build Strength and Burn Calories
- Yin Yoga Sequence for Beginners: A 20-Minute Floor Routine
Ready to choose one?
About Claire Whitaker
Claire Whitaker is part of our editorial team and reviews and edits our yoga guides, checking product details against manufacturer specifications and owner feedback.