
 By Declan Maddox
As an Amazon Associate we earn from qualifying purchases. This page may contain affiliate links.
A free printable chair yoga for seniors pdf is most useful when it gives you a clear set of seated poses, simple cues, and a schedule you can follow without guessing. This guide walks you through the setup, eight core poses, a short weekly plan, and the safety checks that matter most. By the end, you will have a routine you can print, adapt to your body, and practice for 15 to 20 minutes at a time.
Before you print anything, one note: this article is general information, not medical advice. If you have heart disease, osteoporosis, balance problems, recent surgery, or any condition that affects movement, check with your doctor or a physical therapist before starting a new exercise routine.
What a Printable Chair Yoga Plan Should Include
Many printable sheets look similar, but the useful ones share a few features. They name each pose in plain language, describe the starting position, list how long to hold, and say what to avoid. A good plan also shows how to rest between poses and how to stop if something feels wrong.
If you are new to yoga in general, it helps to read Chair Yoga first. That article explains the basic idea of practicing with a chair for support. For broader background on what the practice involves, What Is Yoga? covers the fundamentals in plain terms.
Features to look for in a printable sheet
- Pose names with a one-line description of the starting position
- Hold times written as counts of breaths, such as five slow breaths, rather than vague instructions
- A note on which side to start on and how to switch
- Clear stop signals, such as sharp pain, dizziness, or numbness
- Space for a weekly log so you can track how you feel
Setting Up Your Space for Chair Yoga
Setup matters more than most people expect. A chair that slides, tips, or has wheels will make even gentle poses risky. Before your first session, check these points:
- Choose a sturdy chair with no wheels. A dining chair or armless kitchen chair with a firm seat works well. Test it by pressing down on each corner.
- Place the chair against a wall or in a corner. This gives you a backup surface if you need to steady yourself during a standing transition.
- Clear a space about the width of your arm span. You will reach out to the sides in several poses.
- Keep a phone or cordless phone nearby. Do not rely on it, but have it within reach.
- Wear supportive, flat shoes or go barefoot on a non-slip surface. Smooth socks on hardwood can be slippery.
Tools that make the practice easier
You do not need special equipment to start, but a few simple items can make seated poses more comfortable. A folded towel under the sit bones helps if you have a bony seat or find the chair edge hard. Use a block or a firm cushion to raise the floor under your feet if your heels do not reach the ground comfortably. A strap or a long towel can extend your reach in seated forward folds and arm stretches.
For more detail on how these props work, see Yoga Props Buying Guide and Yoga Towels.
Eight Core Chair Yoga Poses for Seniors
Each pose below can be done in a sturdy armless chair. Move slowly, breathe through the nose when you can, and keep your neck relaxed. Hold each pose for five to eight slow breaths unless noted otherwise.
1. Seated Tall Spine
Sit near the front of the chair with feet flat and hip-width apart. Place your hands on your thighs. Lengthen the crown of your head upward as if a string were lifting it, then let your shoulders drop away from your ears. This is your home base; return here between poses.
2. Seated Cat-Cow
From tall spine, place hands on your knees. On an inhale, arch your back gently and open your chest. On an exhale, round your spine and let your chin drop slightly. Repeat six to eight times at a comfortable pace. Keep the movement small if your lower back is sensitive.
3. Seated Side Stretch
Raise your right arm overhead and lean slightly to the left, keeping both sit bones grounded. Hold for five breaths, then switch sides. Avoid leaning so far that you lose contact with the chair. The goal is length along the side body, not depth.
4. Seated Seated Twist
Place your right hand on the outside of your left knee and your left hand on the chair back or armrest. Turn your torso gently to the left as you inhale to lengthen, and turn slightly more on the exhale. Keep your hips facing forward. Switch sides after five breaths.
5. Seated Figure Four
Cross your right ankle over your left knee so the ankle rests above the knee. Flex the right foot to protect the knee. Sit tall and, if comfortable, lean forward slightly from the hips until you feel a stretch in the outer right hip. Hold for five breaths, then switch. Skip this pose if your knee or hip is painful.
6. Seated Forward Fold
Sit at the front of the chair with feet wide enough to fit your torso between your thighs. Hinge forward from the hips, letting your arms rest on your thighs or hang toward the floor. Keep your neck long. If you feel pressure in your head or lower back, come up slowly and skip this one.
7. Seated Arm Raises and Eagle Arms
Raise both arms out to the sides and up to shoulder height, then overhead if that is comfortable. Next, bring your arms forward, cross them at the elbows, and wrap your forearms if you can. Hold for three to five breaths, then release. This pose supports shoulder mobility and upper back openness.
8. Seated Ankle Circles and Neck Rolls
Lift one foot slightly and draw five circles in each direction at the ankle, then switch. For the neck, drop your ear gently toward one shoulder, hold for three breaths, and return to center. Repeat on the other side. Move the neck slowly and never roll the head backward.
A Simple Weekly Plan You Can Print
A consistent schedule is easier to follow than a long routine you do once. The table below suggests a practice that fits most schedules. Start with the shorter version for the first two weeks, then add a pose or two when the movements feel familiar.
| Day | Focus | Poses | Approximate Time |
|---|---|---|---|
| Monday | Warm-up and breath | Tall spine, cat-cow, ankle circles, neck rolls | 15 minutes |
| Tuesday | Side body and twist | Tall spine, side stretch, seated twist, arm raises | 15 minutes |
| Wednesday | Rest or gentle walk | Optional: tall spine and slow breathing only | 5 minutes |
| Thursday | Hips and hamstrings | Tall spine, figure four, seated forward fold, cat-cow | 18 minutes |
| Friday | Full routine | All eight poses in order | 20 minutes |
| Saturday | Rest or gentle walk | Optional: tall spine and slow breathing only | 5 minutes |
| Sunday | Relaxation | Tall spine, seated side stretch, slow breathing | 10 minutes |
If your schedule is tight, the short routines on Ten-Minute Yoga Routine can be adapted to a seated format. For a slightly longer session, Twenty-Minute Yoga Routine offers a useful structure to borrow from.
Safety Checklist Before Each Session
Use this short checklist before you start. It takes less than a minute and prevents most common problems.
- The chair is stable, with no wheels, and does not rock when you lean.
- You have a clear space and nothing to trip over.
- You have eaten lightly and are not feeling faint or unwell.
- You know which poses to skip based on your health history.
- You have water nearby and a way to reach a phone.
Common Mistakes to Avoid
Most problems in chair yoga come from effort rather than from the poses themselves. Watch for these errors.
- Holding the breath. Breath should keep flowing. If you find yourself gripping, slow down and take a longer exhale.
- Pushing into pain. A gentle stretch is the target. Sharp pain, pinching, or numbness means stop.
- Leaning on the chair back for balance during twists. This can tip the chair. Use the armrest or your own thigh instead.
- Forcing the forward fold. Hinge from the hips and stop well before any strain. Your neck should stay relaxed.
- Skipping the rest. Sit quietly for a few breaths between poses. Fatigue shows up in the form of wobbling and rushing.
If you find that a pose is too challenging, Yoga Pose Modifications explains how to scale movements up or down. Learning to read your own limits is also part of the practice, so Understanding Your Limits in Yoga is worth a read.
Tips for Making Chair Yoga a Habit
Set a regular time, such as after breakfast or before dinner, and keep your chair in the same spot. Put the printed plan where you will see it. Track how you feel in a simple notebook: note the date, the poses you did, and one sentence about your energy or comfort. Over several weeks, patterns become easy to spot. You may notice that certain poses feel better on certain days, which helps you adjust the plan.
For a slower, more supported option on days when you want extra rest, Restorative Yoga describes props-based postures that pair well with a seated routine.
Recommended Gear
These items are useful additions rather than requirements. Choose ones that match your height and comfort level.
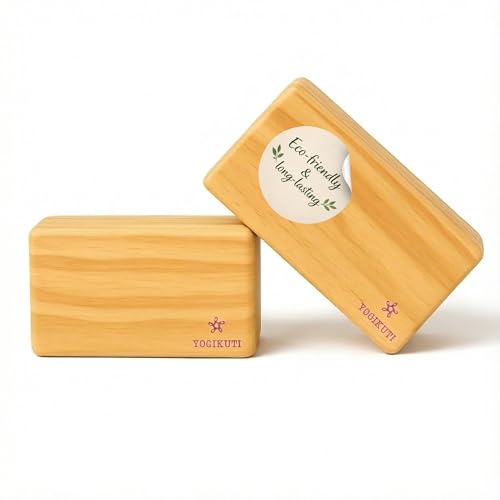
Foam yoga blocks
Blocks raise the floor under your feet or support your hands during seated poses. They help if your feet do not reach the floor flat, which is common with shorter legs or a tall chair. Check price on Amazon
Yoga strap
A strap extends your reach in seated forward folds and arm stretches without forcing your range of motion. It is especially helpful if your shoulders are tight. Check price on Amazon
Folded yoga blanket
A blanket folded into a firm rectangle makes a cushion under your sit bones or behind your lower back. It also adds warmth during slow breathing at the end of the session. Check price on Amazon
For detailed comparisons, see Yoga Blocks Explained, Yoga Straps Explained, and Yoga Blankets.
FAQ: Free Printable Chair Yoga for Seniors PDF
Can I print this plan and use it at home?
Yes. Use your browser’s print function to save or print this page. Choose the PDF option if you want a file to keep on your device. Print at full size so the text is easy to read.
How often should I practice chair yoga?
Three to five sessions per week is a practical starting point for most people. Start with shorter sessions and build up gradually. Rest days matter as much as practice days.
Is chair yoga safe if I have balance problems?
Chair yoga is generally seated and lower risk than standing practice, but it is not risk free. Keep the chair against a wall, use a sturdy chair with armrests, and talk with your doctor or physical therapist before starting, especially if you have had falls.
What if a pose hurts?
Stop the pose and return to tall spine. Mild stretching is normal, but sharp pain, numbness, dizziness, or chest discomfort are reasons to stop and seek medical advice.
Do I need special equipment to start?
No. A sturdy chair, a clear space, and comfortable clothing are enough for the first few weeks. Props such as blocks, straps, and blankets can be added later if they help.

About Declan Maddox
Declan puts together our yoga guides, digging through specifications, manufacturer details and owner reviews so you don't have to.